
As much as I love my iPad Pro, my use of it has always been limited to being a mere multimedia tablet. When it comes to real work, I often myself turning to a true laptop to get it done. Buying the excellent Magic Keyboard as a companion to the iPad was the first step toward reversing that trend.
But ultimately, turning the iPad into a better laptop replacement ended up being as simple as making the following changes to my workflow, along with some minor settings tweaks.
Put your favorite apps in the dock for quick access
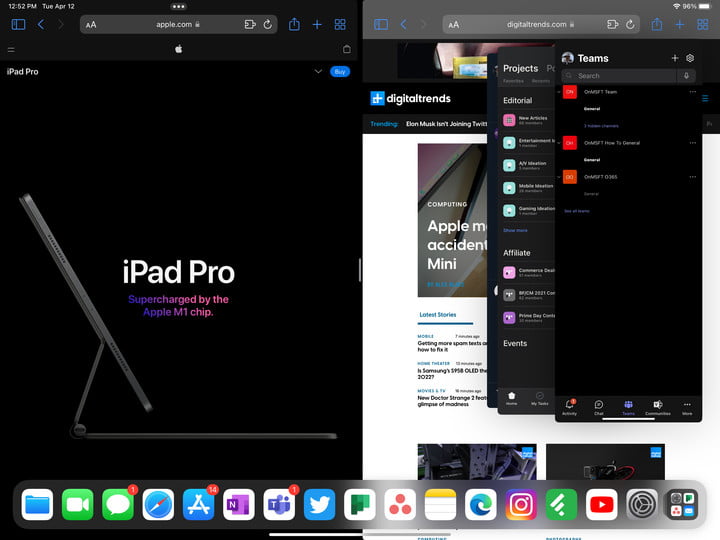
Among my favorite things about MacOS and Windows 11 are the dock and the taskbar, which let you pin your favorite apps for quicker access. Well, with iPadOS 15 bringing some tweaks to multitasking, and letting you slide over a third app when multitasking, the dock on an iPad can be used to do the same.
I have my favorite apps that I use for work pinned down in my iPad dock. The list includes Microsoft Teams, Feedly, and Asana, as well some other social media apps. With these apps pinned in the dock, when I have two apps on split-screen — say two sessions of Safari — I can pull up on the dock, then pull up a third app like Teams or Feedly in the middle of the screen. This then opens an iPhone-shaped app that Apple calls a Slide Over mode.
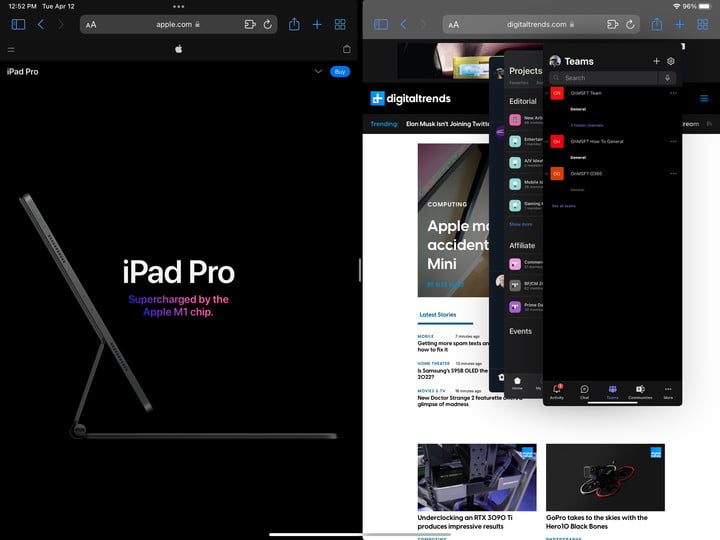
This is kind of the same workflow I have on Mac and Windows, where I keep Teams minimized and pull it up only when I need it. Yet, from there, I can repeat the process, and open the iOS-like app switcher from within any app that is running in Slide Over mode to switch between other open apps that I put in Slide Over mode.
It’s been a great way for me to open multiple apps on my iPad, without having to constantly go to my home screen, and it has saved me a ton of time when responding to Teams messages or adding stories to Asana. The apps I need are right at my fingertips, and one quick drag away!
Use Safari instead of Google Chrome
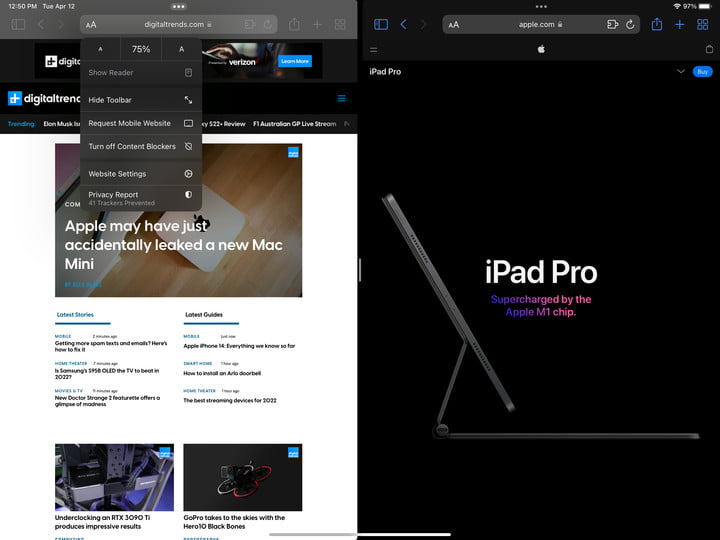
A second tip involves using the iPad’s native web browser, Safari. On iPad OS, Safari functions great, as it will automatically give you the desktop version of specific websites. That means you don’t need to specifically tell the browser to fetch you a desktop website like you would in Chrome.
Safari also has a scaling feature that you can use to scale websites down to fit more on your screen. It’s at the top of the screen, next to the address bar. Oh, and Safari also has multi-window support, so you can drag tabs out to the left or right side of your screen for added multitasking.
I use the scaling and multi-window support to split Safari windows side by side (just like I would on my Mac.) One side has my WordPress flow, and the other side has a space for open tabs and any articles I am monitoring or referencing while writing. Compared to what I usually have open on my Windows and Mac machine, the difference is barely noticeable when websites scale correctly.
Change screen text size so more can fit on the screen
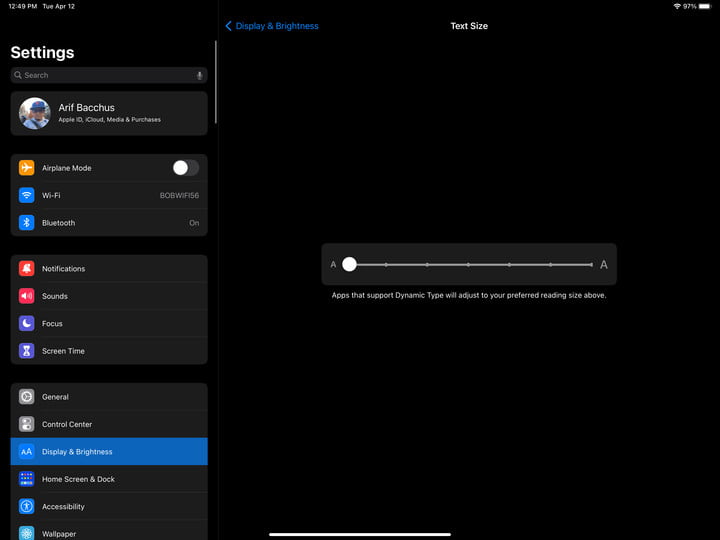
Third up, is a thing about text size. With the iPad Pro having a super-high 2732 x 2048 resolution display, I’ve always wanted to change the scaling so more things can fit on my screen. Windows and Mac do a good job with this, but iPad OS does have a hidden scaling feature, too. It can allow text to look smaller so you get more space in supported apps.
Go to Settings > Display & Brightness > Text Size, and you’ll see a slider that makes text bigger or smaller. Dragging the slider all the way down will adjust the text size in apps that support Dynamic Type. Examples include Twitter, Microsoft Teams, and many other apps. It makes a huge difference in Twitter, for example, as more Tweets can fit on the screen at once. And, in Teams, more chat messages show in the space.
iPad Magic Keyboard tweaks
My last tip is one that involves the iPad Magic Keyboard. As we found when we reviewed it, this optional accessory can really change how you use your iPad. It “floats” the iPad in the air, while adding a MacBook-like keyboard and trackpad for you to use. Yet there are still some additional tweaks that I use to make my iPad feel more like a laptop.
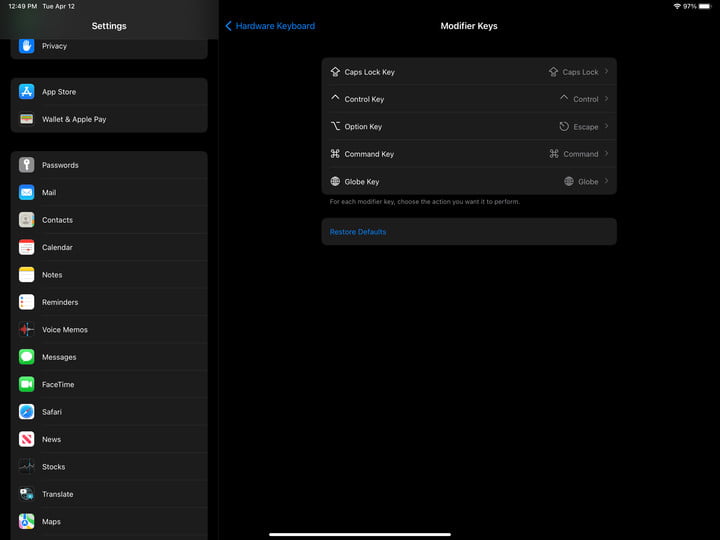
The first of those is remapping keys. The Magic Keyboard has no “escape” key, so I remapped the Option Key to bring back the lost function. You can do this by going to Settings > General > Keyboard > Hardware Keyboard > Modifier Keys. From there, an unused key can be remapped to something more useful. For me, the Option key was tweaked to become the escape key, so I can exit full-screen videos on YouTube without scrolling around with the trackpad.
Another Magic Keyboard tweak involves keyboard shortcuts. Like what I am familiar with using on MacOS or Windows 11, the keyboard has certain shortcuts that can be used in apps. If you long-press the Command key, you’ll see a pop-up prompt with keyboard shortcuts.
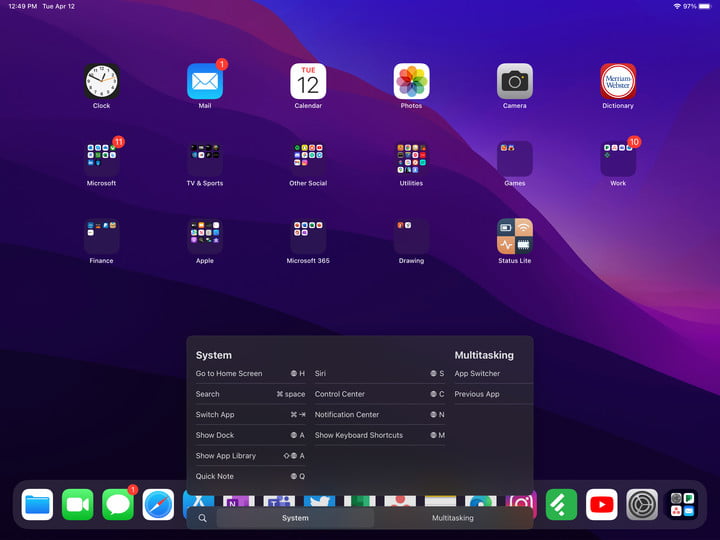
In Safari, for example, you see desktop-like copy-paste shortcuts, as well as shortcuts for opening a new tab, getting to your history, and more. Meanwhile, on Twitter, there are shortcuts for settings, refresh, and search. When you’re on a mobile-first device like an iPad, these can make all the difference in saving time.
Note there are also keyboard shortcuts for iPad navigation too, just like there are on MacOS and Windows for navigation. Command + H can take you to the home screen, Command + Tab can switch you to recently used apps, Command + Shift + 3 can take a screenshot, and Command + Option, + D can show and hide the dock. Additional keyboard shortcuts can be added by going to the iPad’s Accessibility settings.
Making me use my iPad more
With these tweaks, I now find myself using my iPad a lot more for work. They’ve helped me become much more efficient, though I still have to get used to leveraging mobile first-apps, rather than desktop apps. Yet for web-based work, these suggestions can help turn your iPad into your main computer.